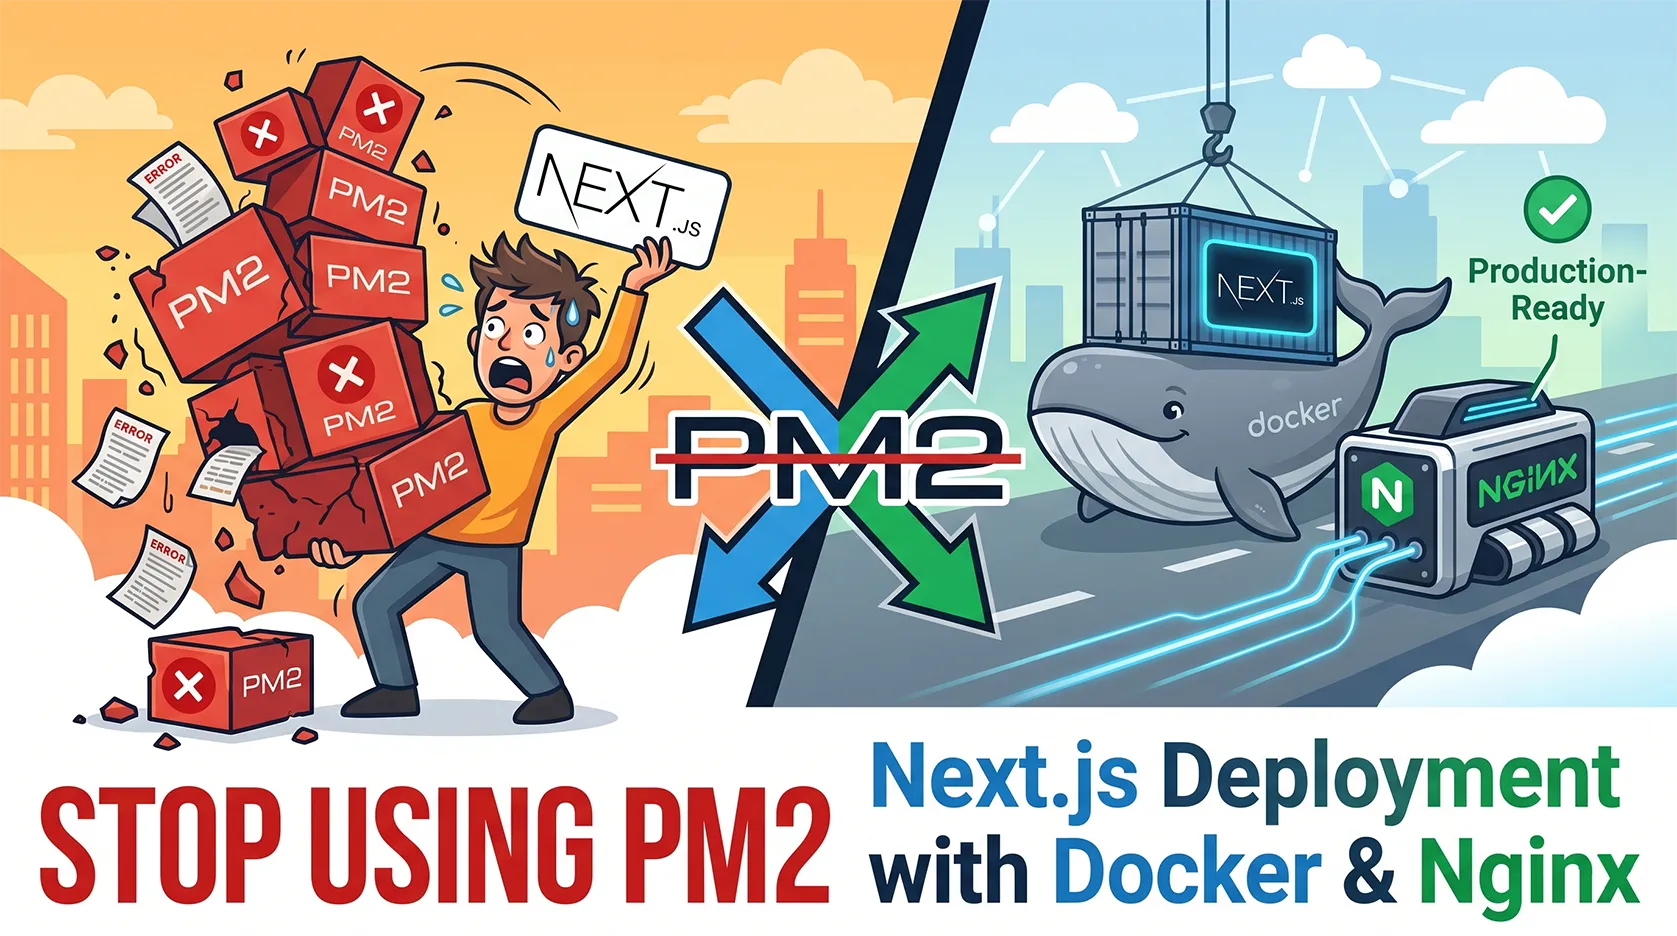
The Perfect Next.js Deployment with Docker: Why It's Time to Forget About PM2
If you build modern web applications with Next.js, sooner or later, you'll face the question of deploying to your own VPS. Most developers take the easy way out: they upload the code to the server, run pnpm install, run pnpm build, and attach the process to PM2.
Sound familiar? It works. But only until your project starts scaling, or until you decide to upgrade the Node.js version on your server and accidentally break all your other projects.
Today, we're going to talk about how to deploy Next.js like a pro — using Docker.
What is Docker in plain English?
Imagine you're moving to a new office. You could transport your things in loose bags, shove them in your pockets, and stack them on the car seat (that's traditional deployment). Or, you could pack everything into standardized, iron shipping containers. To the movers (the server), it doesn't matter what's inside the container — furniture, servers, or bananas. They just take the container and put it in place.
Docker is a tool that lets you package your application (code, Node.js runtime, packages, and all dependencies) into one isolated "container" (image).
The container contains absolutely everything needed to run the project. You no longer need to install Node.js or pnpm on the VPS itself — they are already inside the container.
PM2 vs Docker: Why PM2 is no longer enough?
PM2 is a great process manager. But it runs on top of your operating system. If you use PM2, you face a range of system-level issues:
Version conflicts: One project needs Node.js 18, another (e.g., Next.js 16) needs Node.js 20. The "NVM dance" begins, often leading to confusion.
Server clutter: You install global packages, generate caches, and over time, your clean Ubuntu server turns into a dumping ground for forgotten dependencies.
The "It works on my machine" syndrome: You're on macOS locally, but Linux on the server. You have one library version locally, another on the server. The project breaks during the build on the server.
Docker solves this instantly: A container image is built once. If the container runs successfully on your local machine (whether it's Mac or Windows), it will run with 100% certainty on any Linux-based VPS.
Security and Isolation: An Iron Shield for Your Project
Security is where Docker truly shines:
File System Isolation: Your app runs in its own locked-down environment. Even if a hacker finds a vulnerability in your Next.js code and manages to execute a command on the server, they’ll be trapped inside the container. They won't have access to your VPS's root system, other project databases, or Nginx SSL certificates.
Resource Limits: PM2 can allow a single process to "eat" all your server's RAM (e.g., via a memory leak), taking down every site on that machine. In Docker, you can strictly define limits: "This container can use a maximum of 1GB RAM and 50% CPU."
Network Isolation: Containers communicate via internal virtual networks that don't expose anything to the outside world. You can hide your database (e.g., PostgreSQL) so that only the specific container running your app can access it.
Deployment Convenience and Speed
Fast Rollbacks: You pushed a new feature, and production crashed. With PM2, you have to do a
git revert, wait forpnpm installandpnpm buildall over again, losing precious downtime. With Docker, you simply stop the current container and start the previous image. The rollback takes 2 seconds.Portability: Did your server fail or become too slow? Moving projects without Docker means reconfiguring the entire environment on a new machine. With Docker, you just run one
docker run...command on the new server — and everything just works.
Summary
PM2 is a legacy tool suitable for very simple scripts. Docker is the modern industry standard. It gives developers peace of mind, predictability, and absolute control over how and where their code runs.
Now, let's move to practice. You already understand why we're doing this; now it's time to "pour the concrete" — prepare our Ubuntu-based VPS for Docker. We aren't just going to install Docker; we're going to configure it to run like clockwork, keeping it secure and ready to deploy your Next.js projects.
Step 1: System Update and Environment Preparation
Before installing any software on your VPS, always update your package indexes. This is the golden rule of security and stability.
Bash
sudo apt update && sudo apt upgrade -y
Install the necessary dependencies that allow apt to work with repositories over HTTPS:
Bash
sudo apt install apt-transport-https ca-certificates curl gnupg lsb-release -y
Step 2: Adding the Official Docker Repository
We won't be installing Docker from the standard Ubuntu repositories (they often contain outdated versions). We will add the official Docker repository to ensure we have the latest Docker Engine and Docker Compose.
Add the official Docker GPG key:
Bash
sudo install -m 0755 -d /etc/apt/keyrings
curl -fsSL https://download.docker.com/linux/ubuntu/gpg | sudo gpg --dearmor -o /etc/apt/keyrings/docker.gpg
sudo chmod a+r /etc/apt/keyrings/docker.gpg
Add the repository to the sources list:
Bash
echo \
  "deb [arch=$(dpkg --print-architecture) signed-by=/etc/apt/keyrings/docker.gpg] https://download.docker.com/linux/ubuntu \
  $(. /etc/os-release && echo "$VERSION_CODENAME") stable" | \
  sudo tee /etc/apt/sources.list.d/docker.list > /dev/null
Step 3: Installing Docker Engine
Now, update the package list and install Docker along with docker-compose (which is now included as the docker-compose-plugin):
Bash
sudo apt update
sudo apt install docker-ce docker-ce-cli containerd.io docker-buildx-plugin docker-compose-plugin -y
Check that everything installed correctly:
Bash
sudo docker --version
sudo docker compose version
Step 4: Setting up Docker without root (Security)
By default, Docker requires sudo for every command. This is inconvenient and unsafe for automation. Let's add your user to the docker group:
Bash
sudo usermod -aG docker $USER
Important: After running the usermod command, you need to restart your SSH session (or simply run newgrp docker) for the changes to take effect. Now, you will be able to run containers without needing sudo.
Step 5: Optimization and Security (Production Ready)
To ensure Docker doesn't consume excessive disk space and runs predictably, let's create a configuration file that limits log file sizes (this is often overlooked, leading to logs consuming your entire disk):
Create the
/etc/docker/daemon.jsonfile:
Bash
sudo nano /etc/docker/daemon.json
Insert the following settings:
JSON
{
  "log-driver": "json-file",
  "log-opts": {
    "max-size": "10m",
    "max-file": "3"
  },
  "default-ulimits": {
    "nofile": {
      "Name": "nofile",
      "Hard": 65536,
      "Soft": 65536
    }
  }
}
This will limit each log file to 10MB and keep only the last 3 copies.
Restart Docker:
Bash
sudo systemctl restart docker
Step 6: Docker Compose — Our Best Friend
Since I use the Hestia control panel on Ubuntu, it's important that Docker does not conflict with Nginx network settings. We will use docker compose to describe our entire infrastructure (Next.js + PostgreSQL + Redis) in a single file.
Let's verify that Docker starts automatically after a server reboot:
Bash
sudo systemctl enable docker
What we have now:
The latest version of Docker and Docker Compose.
A configuration that won't "eat up" your disk space with logs.
Secure Docker access without needing
sudoevery time.
The Architecture of Our Solution: Dockerfile, Compose, and Telegram Bot
Now, let's move to the heart of our system. To make deployment as fast and secure as possible, we use the Multi-stage build approach.
Dockerfile: Why it's the "Gold Standard"
Your Dockerfile is three separate "stages" in one file. Why is this cool?
deps: We install all dependencies (node_modules).builder: We build the project while having all dependencies available.runner: We create a miniature image into which we copy only the build result (thestandalonefolder) and the bare minimum needed for execution. This makes the final Docker image 5–10 times lighter than usual.node:22-slim: We don't use Alpine because Slim (based on Debian) is more stable when working with native libraries (like OpenSSL, which Prisma needs).Standalone mode: Duringpnpm build, we use the Next.js Standalone mode. This creates a folder that contains only the code needed to run the server, without any extra "junk."Security (User nextjs): We create anextjsuser with1001permissions. If the container is ever compromised, the attacker won't have root permissions on the server. This is a safeguard against breaking out of the container.
Dockerfile
# syntax=docker/dockerfile:1

# 1. BASE - Change alpine to slim (Debian)
FROM node:22-slim AS base
ENV PNPM_HOME="/pnpm"
ENV PATH="$PNPM_HOME:$PATH"

# Install OpenSSL (needed for Prisma) and ca-certificates
RUN apt-get update -y && apt-get install -y openssl ca-certificates wget

RUN corepack enable

WORKDIR /app

#2. DEPS
FROM base AS deps
COPY package.json pnpm-lock.yaml ./
COPY prisma ./prisma/
RUN --mount=type=cache,id=pnpm,target=/pnpm/store \
pnpm install --frozen-lockfile --ignore-scripts

# 3. BUILDER
FROM base AS builder
WORKDIR /app
COPY --from=deps /app/node_modules ./node_modules
COPY. .

# Build variables
ENV DATABASE_URL="postgresql://dummy:dummy@localhost:5432/dummy"
ENV NEXT_TELEMETRY_DISABLED=1

RUN pnpm prisma generate

ARG NEXT_PUBLIC_API_URL
ARG NEXT_PUBLIC_BASE_URL
ARG NEXT_PUBLIC_RECAPTCHA_SITE_KEY
ENV NEXT_PUBLIC_RECAPTCHA_SITE_KEY=${NEXT_PUBLIC_RECAPTCHA_SITE_KEY}
ENV NEXT_PUBLIC_API_URL=${NEXT_PUBLIC_API_URL}
ENV NEXT_PUBLIC_BASE_URL=${NEXT_PUBLIC_BASE_URL}

# Fake keys for build
ENV TELEGRAM_BOT_TOKEN="mock_token_for_build"
# 👇 THIS LINE HAS BEEN ADDED 👇
ENV TELEGRAM_WORK_BOT_TOKEN="mock_work_token_for_build"
# It is also recommended to add admin IDs to remove the warning
ENV TELEGRAM_ADMIN_IDS="123456"

ENV NEXTAUTH_SECRET="mock_secret_for_build"

# Build in Standalone mode
ENV NEXT_TELEMETRY_DISABLED=1
RUN pnpm build

# 4. RUNNER
FROM base AS runner
WORKDIR /app

ENV NODE_ENV=production
ENV NEXT_TELEMETRY_DISABLED=1
ENV PORT=3000
ENV HOSTNAME="0.0.0.0"

# 🟢 FIX 1: Hardcode cache paths within /app, where we'll definitely have permissions
ENV HOME=/app
ENV COREPACK_HOME=/app/.cache/corepack
ENV PNPM_HOME=/app/.cache/pnpm

# Create a user
RUN groupadd --system --gid 1001 nodejs
RUN useradd --system --uid 1001 nextjs

COPY --from=builder /app/public ./public
COPY --from=builder --chown=nextjs:nodejs /app/.next/static ./.next/static
COPY --from=builder --chown=nextjs:nodejs /app/.next/standalone ./

# Copy prisma and config
COPY --from=builder --chown=nextjs:nodejs /app/prisma ./prisma
COPY --from=builder --chown=nextjs:nodejs /app/prisma.config.ts ./

COPY start-bot.sh .
RUN chmod +x start-bot.sh

# 🟢 FIX 2: Immediately create the .cache folder along with the rest
RUN mkdir -p /app/public/uploads /app/.next/cache /app/.cache

# Grant permissions to the ENTIRE /app folder to the nextjs user (including Prisma files and new cache folders)
RUN chown -R nextjs:nodejs /app

USER nextjs

EXPOSE 3000

CMD ["./start-bot.sh"]
Docker Compose: Infrastructure Management
Your docker-compose.yml is your control panel.
mem_limitandmem_reservation: These are critical for a VPS. You limit the app so it doesn't "eat" all the server's RAM and trigger the OOM Killer (the system won't kill SSH or other services).extra_hosts: This allows the container to see the host machine'slocalhost, which is very convenient for connecting to databases running side-by-side on the VPS.healthcheck: Docker will periodically check if your Next.js is alive (via a request to/api/health). If the server "freezes," Docker will automatically restart the container.
The start-bot.sh script: Why is it smart?
Many people ask: "Why not just run the bot as a separate process?" The answer is: Synchronization.
The bot needs our API to configure the Webhook. If we launch the bot instantly along with the container, it will try to set up the Webhook while Next.js is still "warming up" and not yet responding to requests. The result is a connection error.
How our start-bot.sh works:
Launch: It starts the Next.js server in the background (
node server.js &).Waiting (Readiness Probe): The script enters a
forloop, pinginghttp://127.0.0.1:3000/every second usingwget.Webhook Setup: As soon as the server responds (has successfully loaded), the script instantly makes a request to your API (
/api/telegram/setup).Result: The bot always connects to the Webhook only when the server is fully ready for it.
This is the perfect pipeline: Server is up -> Bot knows where to send data.
docker-compose.yml
services:
  muntai-app:
    build:
      context: .
      dockerfile: Dockerfile
      # We pass only public variables for frontend assembly
      args:
        NEXT_PUBLIC_API_URL: ${NEXT_PUBLIC_API_URL}
        NEXT_PUBLIC_BASE_URL: ${NEXT_PUBLIC_BASE_URL}
        NEXT_PUBLIC_RECAPTCHA_SITE_KEY: ${NEXT_PUBLIC_RECAPTCHA_SITE_KEY}

    container_name: muntai
    restart: always
    ports:
      - "127.0.0.1:3000:3000"

    extra_hosts:
      - "host.docker.internal:host-gateway"

    # All secrets (DB, Token, Auth) will be pulled into the container from here upon startup
    env_file:
      - .env

    environment:
      NODE_ENV: production
      NODE_OPTIONS: "--max-old-space-size=1024"

    mem_limit: 1536m
    mem_reservation: 256m

    # Healthcheck is optimized for Alpine (curl may not be available; use wget, which is available in busybox)
    healthcheck:
      test:
        [
          "CMD",
          "wget",
          "--no-verbose",
          "--tries=1",
          "--spider",
          "http://localhost:3000/api/health",
        ]
      interval: 30s
      timeout: 10s
      retries: 3

    volumes:
      - ./public/uploads:/app/public/uploads

    logging:
      driver: "json-file"
      options:
        max-size: "10m"
        max-file: "3"
The Secret Ingredient: The start-bot.sh script
You might ask: "Why not just specify CMD ["pnpm", "start"] in the Dockerfile?" The answer is simple: Synchronization. We need to accomplish two things:
Launch the Next.js server.
Only after the server has fully loaded, send a request to our API to register the Telegram Webhook.
If you try to do this simultaneously, the bot will attempt to "knock" on a Next.js server that isn't ready yet, get an error, and the Webhook registration will fail. Our script solves this elegantly.
Script Breakdown:
set -e This is a "safety fuse." If any command in the script fails, the entire script stops immediately. This prevents a situation where the bot fails to start, but the container continues running "as if nothing happened."
Bash
cleanup() {
    echo "🛑 Stopping Next.js..."
    kill "$NEXT_PID" 2>/dev/null || true
    wait "$NEXT_PID" 2>/dev/null || true
    exit 0
}
trap cleanup TERM INT
Graceful Shutdown: Docker sends a TERM (or INT) signal when you stop a container. The trap command intercepts this signal. Without this, Docker would simply "kill" the process, preventing it from closing database connections or finishing its logs. We give the server a chance to shut down correctly.
Bash
node server.js &
NEXT_PID=$!
We launch Next.js using node server.js (the result of our Standalone build) and push it to the background using the ampersand (&). $! stores the PID (Process ID) of this background process. We need this so we can control it (stop it in cleanup or wait for it in wait).
Bash
for i in $(seq 1 30); do
    if wget -q --spider http://127.0.0.1:3000/; then
        ...
        break
    fi
    sleep 1
done
Readiness Probe: This is the "heart" of the logic. We make 30 attempts (one per second) to reach our server using wget. --spider is a wget mode that doesn't download the file but simply checks if the server is alive. It's an extremely lightweight and fast operation.
wget -q -O - [http://127.0.0.1:3000/api/telegram/setup](http://127.0.0.1:3000/api/telegram/setup) Registration: As soon as wget receives a 200 OK response, we are sure that Next.js is ready. We call our API, which registers the Webhook in Telegram.
wait $NEXT_PID This is the final command. It tells the script: "Stay alive as long as the Next.js process is alive." As soon as Next.js crashes (e.g., due to an error), wait will finish, the script will close, and the Docker container will automatically stop (or restart, if restart: always is set in your docker-compose).
Why is this a professional approach?
Most beginners just run pnpm start and hope for the best. We, however, have created a "self-sufficient system."
Our container launches itself, monitors its own status, connects to external services (like Telegram) automatically, and shuts down gracefully when it needs to stop. You will no longer need to log into the server manually to "restart the bot" or "reset the Webhook." This is the true magic of Docker that simple tutorials never tell you about.
start-bot.sh
#!/bin/sh
set -e

# Function for graceful termination
cleanup() {
echo "🛑 Stopping Next.js..."
kill "$NEXT_PID" 2>/dev/null || true
wait "$NEXT_PID" 2>/dev/null || true
exit 0
}

# Intercept stop signals (from Docker)
trap cleanup TERM INT

echo "🚀 Starting Next.js..."
node server.js &
NEXT_PID=$!

echo "⏳ Waiting for server to start..."
# Trying to reach the server (maximum 30 seconds)
for i in $(seq 1 30); do
if wget -q --spider http://127.0.0.1:3000/; then
echo "✅ Server is up!"

# --- HERE WE PUSH THE BOT ---
echo "🤖 Setting up Telegram Webhook..."
# We're using 127.0.0.1 since we're inside a container.
# wget -q -O - prints the response to the console so you can see the result
wget -q -O - http://127.0.0.1:3000/api/telegram/setup || echo "❌ Failed to setup bot"
echo "" # just a line break for aesthetics
# -------------------------------

break
fi
sleep 1
done

echo "📡 Next.js server running with PID $NEXT_PID"

# Wait for the Next.js process to run. If it crashes, the script will terminate.
wait $NEXT_PID
The Magic of Standalone: Why Docker is Pointless Without It
When you run a standard next build, Next.js creates a .next folder and dumps everything inside. If you simply copy that into Docker, you'll end up with a "heavyweight" container. However, Next.js has a "Standalone" mode.
What does it do? When you enable output: 'standalone', Next.js automatically analyzes your files (via outputFileTracing) and collects the minimal required folder, containing only the code and node_modules actually needed to run the server.
This allows us to simply copy the standalone folder during the RUNNER stage of our Dockerfile, resulting in a ready-to-go server without any extra "ballast."
Analyzing your next.config.ts
Here is an example of the next.config.ts file we use. Let's break down why every line here is a professional standard:
TypeScript
import type { NextConfig } from 'next'

const nextConfig: NextConfig = {
// 1. Security: hide that the site is on Next.js
poweredByHeader: false,

// 2. The same "gold": create a minimal build
output: 'standalone',

experimental: {
serverActions: {
bodySizeLimit: '10mb',
},
},

// 3. Image security: allow only trusted domains
images: {
remotePatterns: [{ protocol: 'https', hostname: '**' }],
},

sassOptions: {
silenceDeprecations: ['import'],
},

// 4. Helps Next.js understand the root folder in Docker
outputFileTracingRoot: __dirname,
}

export default nextConfig
Why is this critical for us?
output: 'standalone': This is our key player. It creates the.next/standalonefolder, which is where we pull the server for our Docker container. This reduces the image size from 1-2 GB down to a mere 100-200 MB.poweredByHeader: false: Standard Next.js adds anX-Powered-By: Next.jsheader to HTTP responses. For security, it's better to hide this so hackers don't know exactly what your site is built with.outputFileTracingRoot: __dirname: In a Docker container, the folder structure differs from your local machine. This parameter tells Next.js: "Listen, look for dependencies relative to the current folder, not the system root." Without this, you sometimes get "module not found" errors during runtime.images.remotePatterns: If you pull images from other sources in production (e.g., AWS S3 or Google Cloud), you need to explicitly allow those domains. Usinghostname: ''gives you flexibility, but ideally, you should define specific domains for maximum security.
What does this give us in the Dockerfile?
Remember our Dockerfile? We wrote: COPY --from=builder --chown=nextjs:nodejs /app/.next/standalone ./
It is precisely because next.config.ts has output: 'standalone' that this standalone folder exists. We just copy it — and voila, our server is ready. We don't even need to run pnpm install in the final image.
Your Docker image becomes "atomic": it contains only what is needed to execute, and nothing extra. This isn't just fast; it’s reliable. No extra files mean fewer security holes.
The biggest mistake beginners make when deploying is dragging "junk" to the server (like local node_modules, the .next folder, .git, or files containing secrets). In Docker deployment, we follow the principle: "Transfer only what is needed for the build."
Let's break down exactly what should end up on your VPS.
.dockerignore — Your Best Friend
Before we copy a single file, you must create a .dockerignore file in the project root. It works just like .gitignore, but tells Docker which files not to copy inside the container. If you don't do this, your Docker image will bloat to gigabytes.
Your .dockerignore should look like this:
Plaintext
node_modules
.next
.git
.env
.env.local
.vscode
.idea
dist
out
build
*.log
See that? We ignore node_modules and .next because they will be recreated inside Docker during the build process. This guarantees a "clean" and predictable architecture.
List of files to copy to your VPS
To ensure your project builds and runs successfully on the server, you need to transfer the following "minimal set":
1. Infrastructure files (Run management)
Dockerfile: Your instruction manual on "how to build the project."docker-compose.yml: Your infrastructure control panel.start-bot.sh: The script that starts Next.js and connects the bot. Don't forget this one.
2. Project files (Code and configurations)
package.jsonandpnpm-lock.yaml: Without these, Docker won't know which library versions to install.next.config.ts: Our configuration file whereoutput: 'standalone'is set.tailwind.config.ts(and other configs:tsconfig.json,postcss.config.mjs, etc.): These are required during thepnpm buildphase.prisma/folder: Mandatory! It containsschema.prisma. Without it,pnpm prisma generatewon't find the data model.src/folder: Your source code.public/folder: Your static files (images, icons, robots.txt).
3. The secret .env file (Important note)
ATTENTION! Never copy .env via Git. You must create it directly on the VPS. After copying all the files (e.g., via git pull or rsync), you need to create the .env file on the server manually:
Bash
nano .env
The "localhost" trap: Why your project can't see the database
When you run the project on your computer (directly via node or pnpm dev), your application and the database (e.g., PostgreSQL or Redis) live in the same "world" — your localhost. They see each other perfectly.
But Docker is a "prison" (in a good way). A container has its own isolated network. When you write localhost inside the container, Docker thinks you are referring to the container itself. It looks for the database inside the container, but it's not there — it's sitting "outside" on your VPS.
That is why we use the magic host host.docker.internal.
What is host.docker.internal?
It's a special hostname that Docker automatically maps to the internal IP address of your host machine (your VPS). It's a sort of "bridge" that allows the container to peek outside and knock on your server's door.
Important: In our
docker-compose.yml, which we wrote earlier, we specifically added the lineextra_hosts: - "host.docker.internal:host-gateway". This is the exact command that tells Docker where to "knock" when this hostname is used.
How to configure .env for production
On your VPS, in the project folder, create a .env file (remember, we don't copy it via Git; we create it right on the server). Here is how your database and Redis configs should look to work via Docker:
1. PostgreSQL
Instead of localhost, we point to our host:
Plaintext
# Locally:
# DATABASE_URL="postgresql://muntai:password@localhost:5432/db_name"

# For Docker:
DATABASE_URL="postgresql://muntai:password@host.docker.internal:5432/db_name"
2. Redis
If you are using Redis, the situation is similar. Your docker-compose now sees it through the same "bridge":
Plaintext
REDIS_HOST=host.docker.internal
REDIS_PORT=6379
# If your code uses a full connection URL:
REDIS_HOST_URL=redis://host.docker.internal:6379
Tips for .env security and stability
Don't hardcode: Never write these values in your
Dockerfileornext.config.ts. They should only exist in the.envfile on the server. This allows you to quickly change database passwords or migrate to a different server without rebuilding the entire Docker image.Passwords: Ensure the database password (and other secrets) in the
.envfile on the server is restricted with proper access permissions so other server users cannot read it:chmod 600 .envDebug: If you see a
Connection refusederror after deployment (even though the database is definitely running), ensure your database (PostgreSQL) is configured inpostgresql.confto listen not only to127.0.0.1but also to0.0.0.0or specifically the Docker bridge IP address. Otherwise, it simply won't "hear" the container.
Now our infrastructure is fully ready:
The container is built correctly.
External services (Database, Redis) are connected.
We've bypassed all the pitfalls of the local environment.
And remember to insert all your variables (bot token, DATABASE_URL, NEXTAUTH_SECRET, etc.) into the .env file. This way, your secrets will never end up in the repository.
How to transfer these files efficiently?
Since we have already set up SSH access to your VPS, there are two cool ways to do this:
Option A: Via Git (Professional)
git pushyour project to a separate branch (or main).On the server, navigate to the project folder:
cd /var/www/your_domain.Run
git pull origin main.Create the
.envfile (if it doesn't exist yet).
Option B: Via rsync (Fast)
If you want to transfer files directly from your local machine (without Git):
Bash
rsync -avz --exclude '.git' --exclude 'node_modules' --exclude '.next' . user@your-vps-ip:/var/www/your_domain
This command sends everything needed and automatically ignores anything unnecessary.
Deployment and Server "Hygiene": Why Are Our Commands So Long?
When you see a command consisting of 5-6 parts separated by &&, don't be scared. This is our way of telling Docker: "Create the new, delete the old, and clean up the trash."
Breaking down the "magic" deployment command:
Bash
docker compose down && docker compose up -d --build && docker system prune -f && docker image prune -a -f && docker builder prune --all -f
docker compose down: We completely stop the container and remove it. This is important for a "clean" start.docker compose up -d --build: We start the build from scratch (the--buildflag is mandatory to pick up code changes) and bring the container up in detached mode (-d).docker system prune -f: Removes all stopped containers, unused networks, and "dangling" images (those left without tags). The-fstands for "force"—so it doesn't ask for confirmation every single time.docker image prune -a -f: Removes absolutely all images that are not used by any running container. This frees up disk space.docker builder prune --all -f: This is the most important one! It clears the build cache. If you don't do this, the cache can grow to 10-20 GB.
Tip: If you are confident in your code and want to be even more aggressive, you can use docker compose build --no-cache, but the command above is the "golden mean."
Living After Deployment: Monitoring and Control
You didn't just "deploy and forget." You are the captain, and you need to know the state of affairs on board.
Logs are your eyes: If something goes wrong (e.g., a 500 error), you need to see it immediately: Bash
docker logs -f your_container_nameThe
-f(follow) flag keeps the log open so you can see new errors in real-time.Monitoring disk usage: Once a month, be sure to check how much space Docker is taking up: Bash
docker system dfThis will show you how much space images, containers, and the cache are occupying. If you see that the
Build Cachehas grown too large, feel free to rundocker builder prune.
Updating the Prisma DB: A Special Operation
This is the most frequently asked question: "I added a new field to schema.prisma, how do I update the database?". Never do this directly in the container via docker exec during the build process. Do it after the container has started, so you don't lose any data.
Once you've changed the schema and deployed the code: First, bring up the new container.
Push changes to the DB: Enter the running container and tell Prisma to update the structure:
Bash
docker exec -it muntai pnpm dlx prisma db pushThis is a "trigger" command. Prisma compares your new schema with what is currently in the database and applies the changes (adds columns, indexes, etc.).
After this: I strongly recommend performing a "clean" restart of the container so that Next.js picks up the new structure:
Bash
docker compose down && docker compose up -d --build && docker system prune -f
Why is this approach better than "just docker restart"?
Because docker restart does not update the image. In our case (with multi-stage builds), all code changes are baked into the image itself. When you run up -d --build, Docker understands that the code has changed, rebuilds only the necessary layers, and launches a fresh, up-to-date version of your project.
This guarantees that the code on the server is exactly the same as the one you just tested locally.
Final Act: Nginx as Your Project's "Gatekeeper"
The Docker container with our Next.js runs inside its own isolated network. But who will communicate with the internet, handle SSL certificates, and serve static files? This is where Nginx comes into play.
Nginx acts as our "proxy panel." It accepts requests from the internet (HTTPS), "unpacks" them, and sends them to our Docker container, which is listening on port 3000.
Option 1: If you use HestiaCP (The Professional Approach)
HestiaCP is a cool tool, but it has one quirk: it automatically overwrites configuration files. If you edit files manually, they will disappear after an update or an SSL change. That is why we create custom templates.
Create templates: Create two files (I named mine, for example):
muntainextjs.tpl(for HTTP) andmuntainextjs.stpl(for HTTPS) with the code you’ve configured. This ensures that Nginx "knows" about our special needs: buffering for Server Actions and proper handling of/_next/static.Copy them to the server: Upload these files to the
/usr/local/hestia/data/templates/web/nginxfolder.Activate in the panel:
Go to Hestia -> WEB -> Edit Domain.
Advanced settings -> Proxy Template.
Select your new
muntainextjs.
Examples of my templates:
1. File muntainextjs.tpl (HTTP)
server {
    listen      %ip%:%proxy_port%;
    server_name %domain_idn% %alias_idn%;
    error_log   /var/log/%web_system%/domains/%domain%.error.log error;

    # Include standard redirect to HTTPS if SSL is enabled
    include %home%/%user%/conf/web/%domain%/nginx.forcessl.conf*;

    # [FIXED] Upload limit (must match next.config.ts)
    client_max_body_size 10M;

    # Gzip compression
    gzip on;
    gzip_vary on;
    gzip_proxied any;
    gzip_comp_level 6;
    gzip_types text/plain text/css application/json application/javascript text/xml application/xml application/xml+rss text/javascript;

    # Security headers
    add_header X-Frame-Options "SAMEORIGIN" always;
    add_header X-Content-Type-Options "nosniff" always;

    # 1. Handle Let's Encrypt
    location /.well-known/acme-challenge/ {
        alias %home%/%user%/web/%domain%/public_html/.well-known/acme-challenge/;
        try_files $uri =404;
    }

    # 2. Proxy for system files
    location ~ ^/(sitemap.xml|robots.txt)$ {
        proxy_pass http://127.0.0.1:3000;
        proxy_set_header Host $http_host;
        proxy_cache_bypass $http_upgrade;
        proxy_read_timeout 60s;
    }

    # 3. Main proxy for Next.js
    location / {
        proxy_pass          http://127.0.0.1:3000;
        proxy_set_header    Host $http_host;
        proxy_set_header    X-Real-IP $remote_addr;
        proxy_set_header    X-Forwarded-For $proxy_add_x_forwarded_for;
        proxy_set_header    X-Forwarded-Proto $scheme;
        proxy_set_header    X-Forwarded-Host $host;

        # Buffer settings (helps with INVALID_MESSAGE)
        proxy_busy_buffers_size   512k;
        proxy_buffers             4 256k;
        proxy_buffer_size         256k;

        proxy_connect_timeout 60s;
        proxy_send_timeout 60s;
        proxy_read_timeout 60s;

        proxy_http_version  1.1;
        proxy_set_header    Upgrade $http_upgrade;
        proxy_set_header    Connection "upgrade";
    }

    # DIRECT SERVING OF UPLOADS
    location /uploads/ {
        alias %home%/%user%/web/%domain%/public/uploads/;
        expires 30d;
        add_header Cache-Control "public, no-transform";
        access_log off;
        try_files $uri =404;
    }

    location /error/ {
        alias %home%/%user%/web/%domain%/document_errors/;
    }

    location ~ /\.(?!well-known\/) {
        deny all;
        return 404;
    }

    include %home%/%user%/conf/web/%domain%/nginx.conf_*;
}
2. File muntainextjs.stpl (HTTPS)
server {
    listen      %ip%:%proxy_ssl_port% ssl;
    server_name %domain_idn% %alias_idn%;
    error_log   /var/log/%web_system%/domains/%domain%.error.log error;

    # --- SSL Directives ---
    ssl_certificate     %ssl_pem%;
    ssl_certificate_key %ssl_key%;
    ssl_stapling         on;
    ssl_stapling_verify on;

    # [FIXED] Upload limit for images
    client_max_body_size 10M;

    # Gzip compression
    gzip on;
    gzip_vary on;
    gzip_proxied any;
    gzip_comp_level 6;
    gzip_types text/plain text/css application/json application/javascript text/xml application/xml application/xml+rss text/javascript;

    # Security headers
    add_header X-Frame-Options "SAMEORIGIN" always;
    add_header X-Content-Type-Options "nosniff" always;

    # TLS 1.3 0-RTT anti-replay
    if ($anti_replay = 307) { return 307 https://$host$request_uri; }
    if ($anti_replay = 425) { return 425; }

    # HSTS
    include %home%/%user%/conf/web/%domain%/nginx.hsts.conf*;

    # 1. Handle Let's Encrypt
    location /.well-known/acme-challenge/ {
        alias %home%/%user%/web/%domain%/public_html/.well-known/acme-challenge/;
        try_files $uri =404;
    }

    # 2. Proxy for Sitemap and Robots
    location ~ ^/(sitemap.xml|robots.txt)$ {
        proxy_pass http://127.0.0.1:3000;
        proxy_set_header Host $http_host;
        proxy_cache_bypass $http_upgrade;
        proxy_read_timeout 60s;
    }

    # 3. Next.js static assets optimization
    location /_next/static/ {
        proxy_pass          http://127.0.0.1:3000;
        proxy_set_header    Host $http_host;
        expires 365d;
        add_header Cache-Control "public, immutable";
    }

    # 4. Main proxy for Next.js
    location / {
        proxy_pass          http://127.0.0.1:3000;
        proxy_set_header    Host $http_host;
        proxy_set_header    X-Real-IP $remote_addr;
        proxy_set_header    X-Forwarded-For $proxy_add_x_forwarded_for;
        proxy_set_header    X-Forwarded-Proto $scheme;
        proxy_set_header    X-Forwarded-Host $host;

        # Increased buffers for stable Server Actions
        proxy_busy_buffers_size   512k;
        proxy_buffers             4 256k;
        proxy_buffer_size         256k;

        proxy_connect_timeout 60s;
        proxy_send_timeout 60s;
        proxy_read_timeout 60s;

        proxy_http_version  1.1;
        proxy_set_header    Upgrade $http_upgrade;
        proxy_set_header    Connection "upgrade";
    }

    # DIRECT SERVING OF UPLOADS
    location /uploads/ {
        alias %home%/%user%/web/%domain%/public/uploads/;
        expires 30d;
        add_header Cache-Control "public, no-transform";
        access_log off;
        try_files $uri =404;
    }

    location ~ /\.(?!well-known\/) {
        deny all;
        return 404;
    }

    include %home%/%user%/conf/web/%domain%/nginx.ssl.conf_*;
}
Important: Ensure that the public/uploads folder on the host server has the correct permissions. Run: chown -R 1001:1001 ./public/uploads so that the container can freely save files uploaded by users.
That's it! Hestia is now "linked" to your template and won't overwrite your configuration.
Option 2: If you configure Nginx manually (Pure VPS)
If you don't use control panels and manage the server via the terminal, here is your config. It includes two "magic" features that distinguish amateurs from pros:
1. Aggressive caching (/_next/static/) Next.js adds hashes to file names (e.g., main-123456.js). This means these files will never change. We tell the browser: "Keep this forever."
Nginx
location /_next/static/ {
    proxy_pass http://127.0.0.1:3000;
    proxy_set_header Host $http_host;

    # Cache for a year, the file won't change (immutable)
    expires 365d;
    add_header Cache-Control "public, immutable";
}
2. WebSocket support (for HMR) You don't strictly need this for deployment, but if you ever decide to run a development build on the server, this will allow "Hot Module Replacement" (HMR) to work:
Nginx
location / {
    proxy_pass http://127.0.0.1:3000;
    # ... other headers ...

    # Support for WebSockets
    proxy_http_version 1.1;
    proxy_set_header Upgrade $http_upgrade;
    proxy_set_header Connection "upgrade";
}
Why did we add these complex buffer settings?
You might have noticed these lines in the config:
Nginx
proxy_busy_buffers_size   512k;
proxy_buffers             4 256k;
proxy_buffer_size         256k;
Without them, when Next.js (especially with Server Actions) sends a large response, Nginx might throw a 502 Bad Gateway error or an upstream sent too big header error. These settings allow Nginx to handle "heavy" requests from your Docker container without stress. This is the "stability" that people pay for in the industry.
A warning about the Firewall (UFW)
Docker has a unique trait: it automatically rewrites iptables rules to forward ports. This sometimes conflicts with ufw (the standard Ubuntu firewall).
My advice: If you use
ufw, remember that Docker sometimes "bypasses" its rules for open ports. Don't rely solely on the firewall; always configure access to the database and Redis to listen only via127.0.0.1(as we did indocker-compose.yml) so they don't "stick out" to the public internet.
Your project is no longer just a folder of code; it's a reliable ecosystem. It's isolated, secure, self-restarting, and easy to update. You are no longer dependent on specific Node.js versions on the server or a poorly configured environment. You’ve got a true Production-ready stack.
Коментарі (0)
Leave a comment